Get Started By Posting Your Event On The SponsorMyEvent Marketplace
Finding event sponsors is no easy feat. By posting your event on SponsorMyEvent’s Marketplace, you’ll gain exposure to thousands of sponsors who are searching for events just like yours to sponsor. This post will walk you through the best practices of creating an event prospectus and page for your event on the Marketplace.
PRO TIP
Your event must surpass 70% completion in order to be reviewed by our team for approval and publication on the Marketplace. So your event profile serves two purposes: one, to get approved for your event to go live and two, to attract and persuade sponsors to select your event.
Choose A Professional Headshot
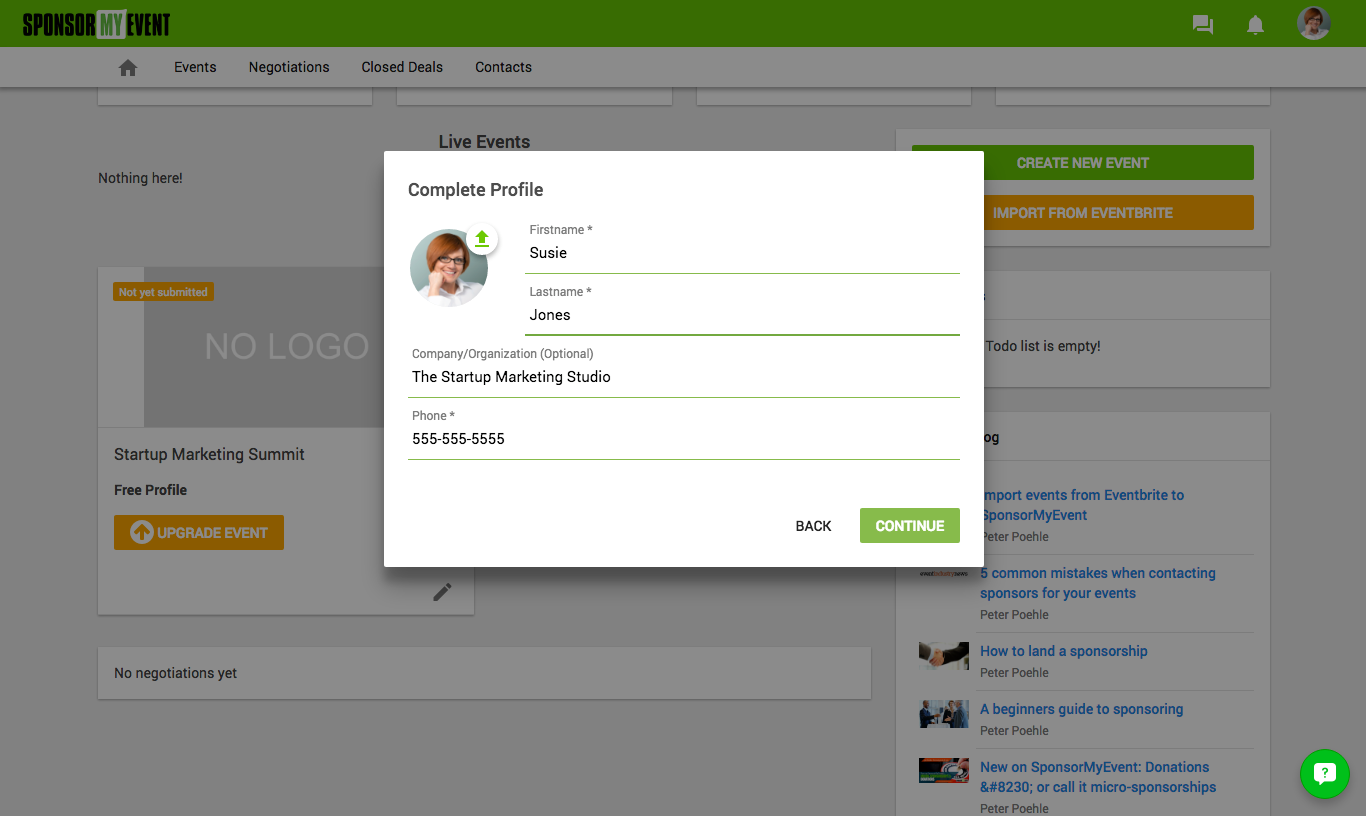
The first thing you’ll need to do is to provide your headshot, name, phone number and event name. Choose a headshot photo that conveys your professionalism as an event organizer. It’ll be seen by the sponsors that visit your event’s profile page and in any dialogues you have with them. You may be tempted to choose a photo of yourself that reflects the nature of your event.
Remember that even though your event may be for entertainment purposes, the transaction between you as an organizer and prospective sponsors is of a business nature.
Upload Your Logo
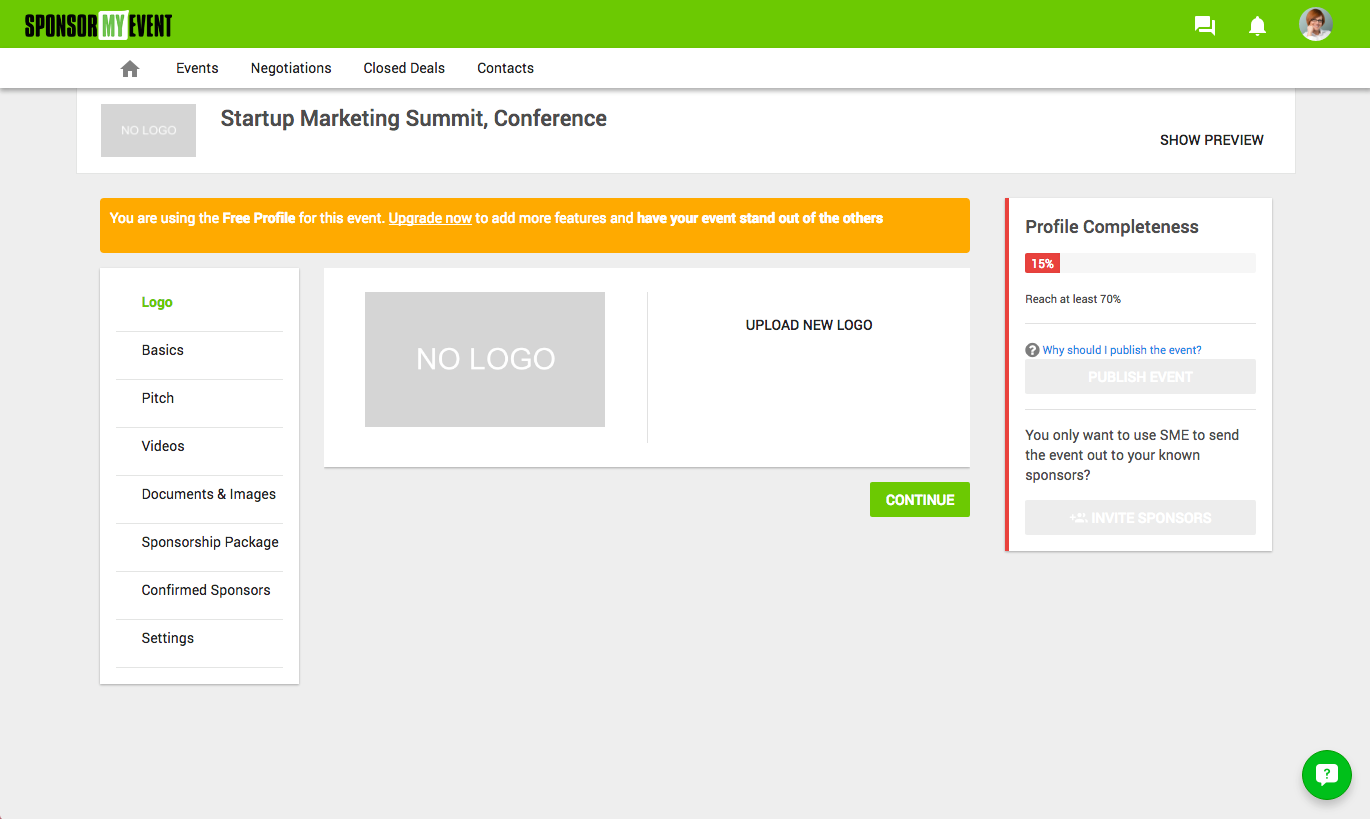
The next step is to upload your event’s logo. Make sure that the artwork is sized to the correct dimensions (____) so that it’s legible and not distorted. Don’t use pixelated artwork. We recommend Canva for creating custom artwork for this field. I used it to quickly create the demo logo for The Startup Marketing Summit (our demo event) in this tutorial.
Fill In The Basics
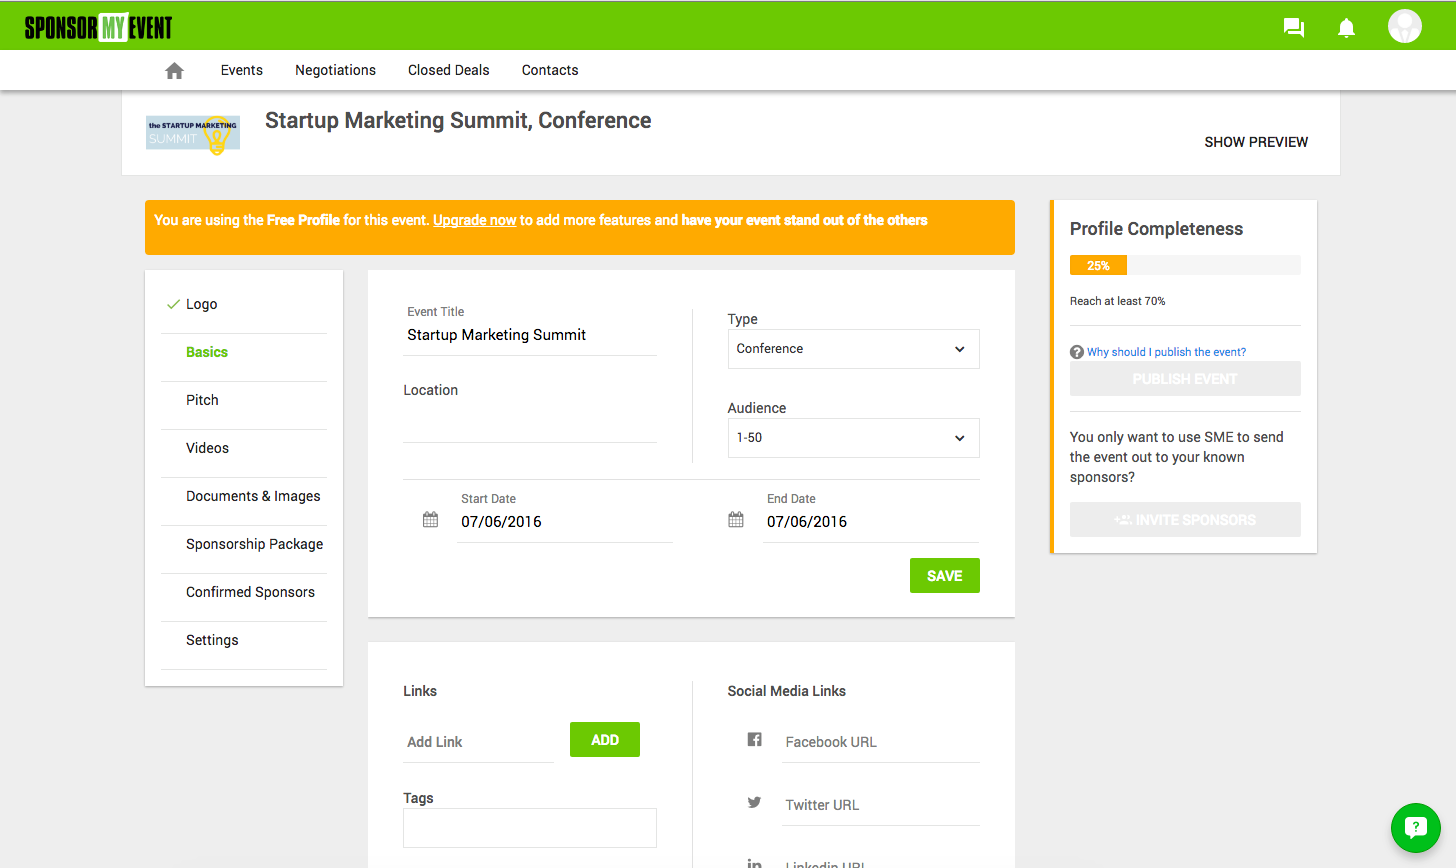
Here you’ll enter the name of your event. Pay careful attention to spelling, capitalization and punctuation when inputting the title as this text is what will be published in the Marketplace if your event is approved. Another area to take note of is the tagging section. These tags will help sponsors find your event when they’re using our search feature so think about common keywords to describe your event and/or your event’s attendees.
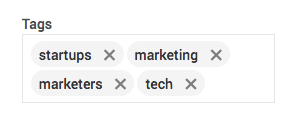
As you can see, I used “startups”, “marketing”, “marketers” and “tech” to tag our demo event.
The Pitch
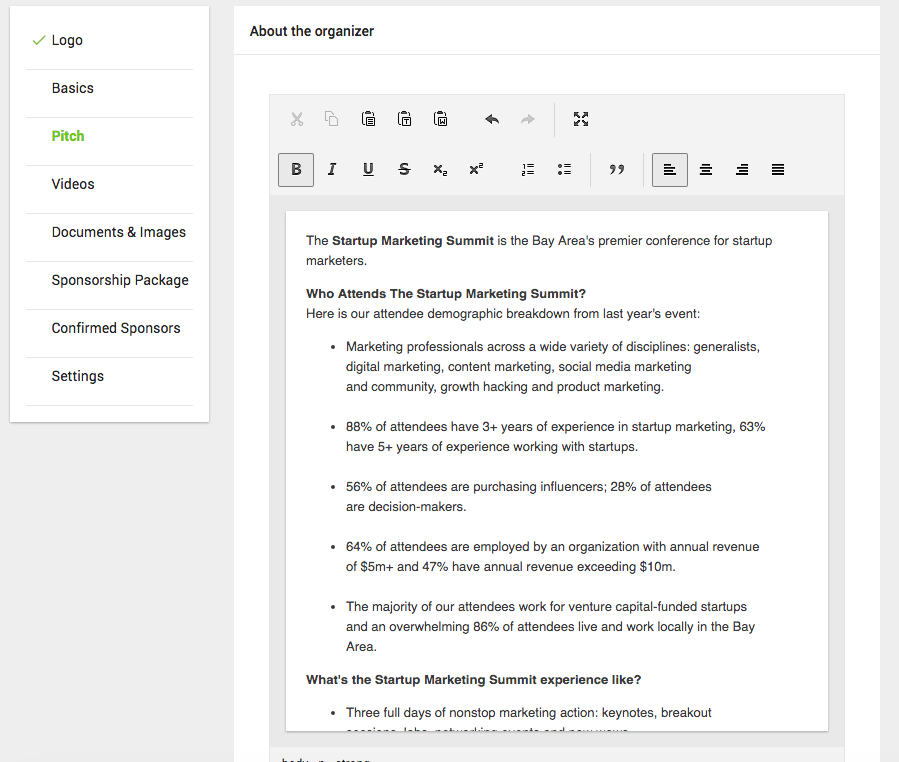
We’ve arrived at what might be the most important section in your event profile: the pitch. This section is where you can pitch your event to prospective sponsors. Start with an overview of your event including its location, description and who the attendees are. Remember, this pitch is your chance to help sponsors understand why they should consider sponsoring your event so craft the pitch so that it does just that. Any data you have around your attendee base is tremendously helpful to sponsors so that they can quantify who they’ll be able to reach.
PRO TIP
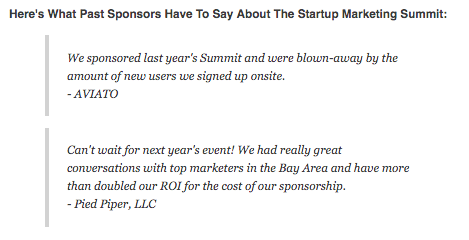
Consider including brief testimonial quotes from past or current, committed sponsors about the impact that your event had on their goals.
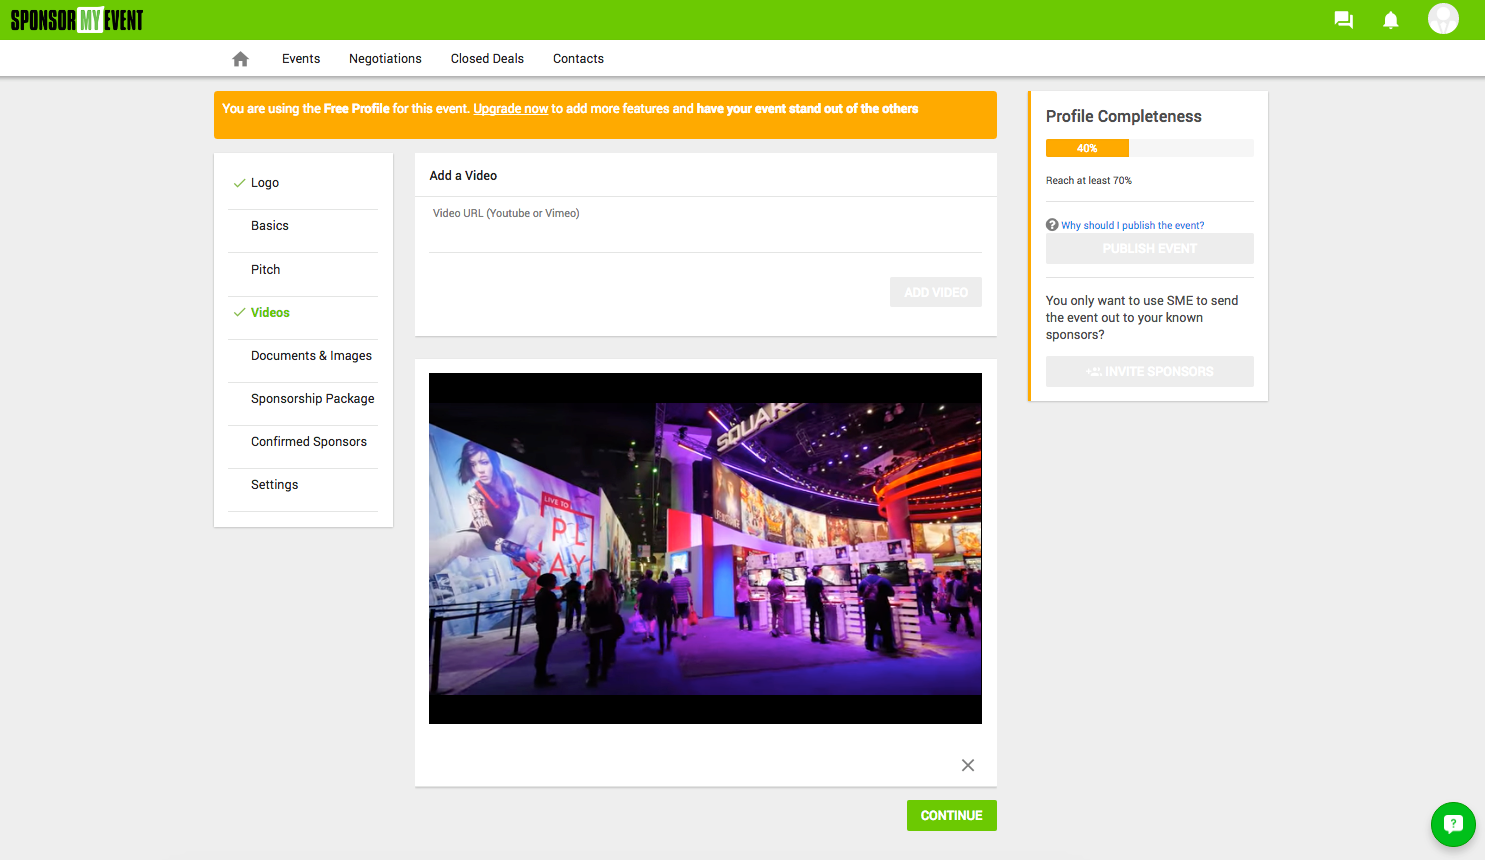
And…action! Adding Video To Your Event’s Profile
Next up is the video section of your profile. You may choose to link to a video of your last event, your promotional video for this event or even a video of prior attendees (or sponsors!) talking about their experience and the benefits they enjoyed as a result of participating in your event.
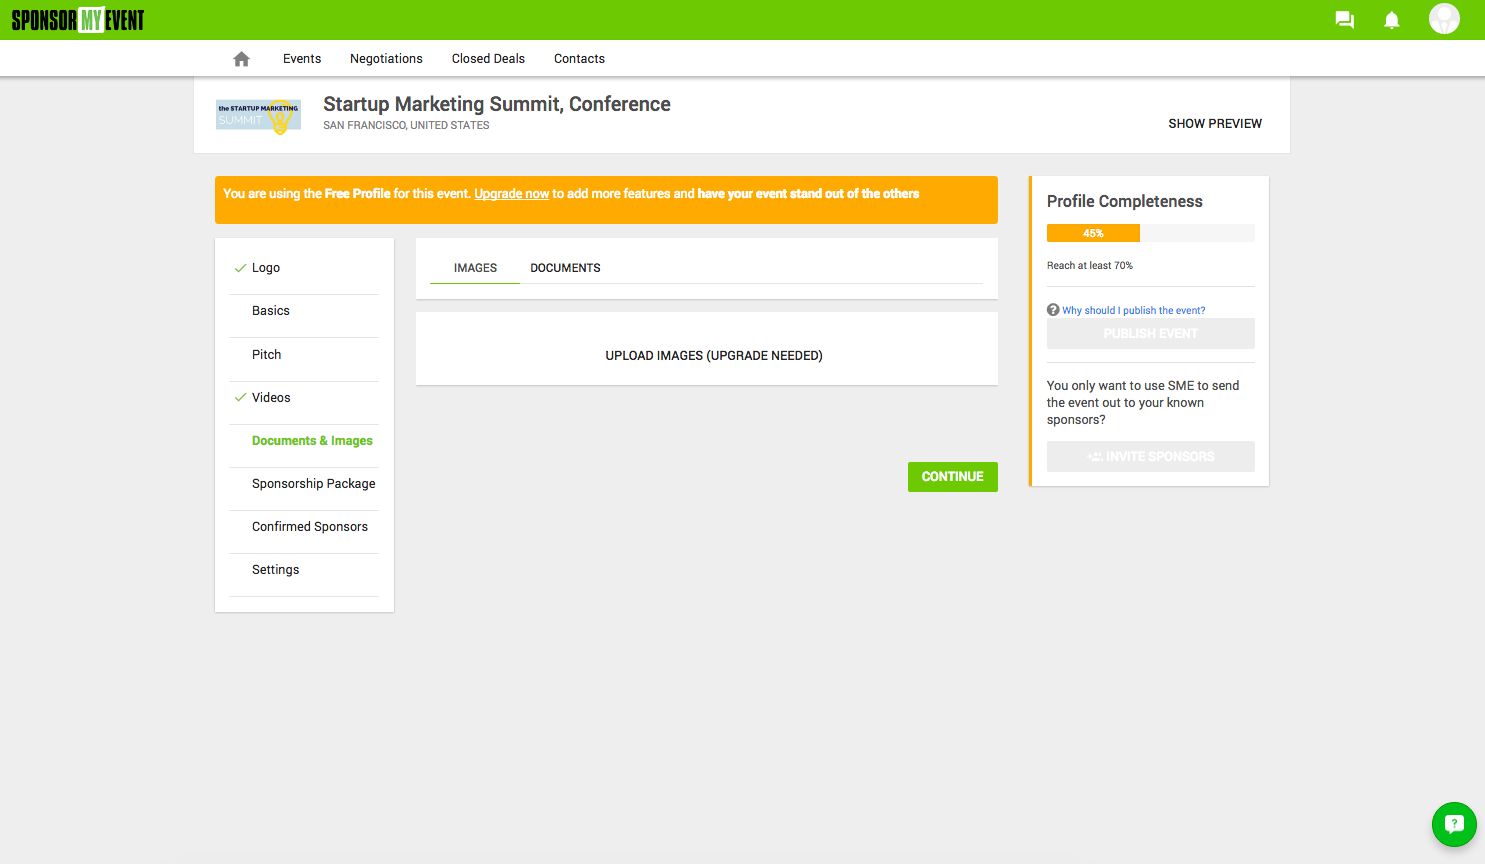
PRO TIP
By upgrading your event’s profile page, you can add images and documents such as your full event prospectus .pdf.
Sponsorship Packages
This section allows you to add your event’s range of sponsorship packages to your event profile. You can choose from one of the template offerings or create your own. When doing so, watch your spelling, punctuation and grammar as these packages will be exactly what prospective sponsors see. Input the price of the individual package, deadline to purchase, name and description.
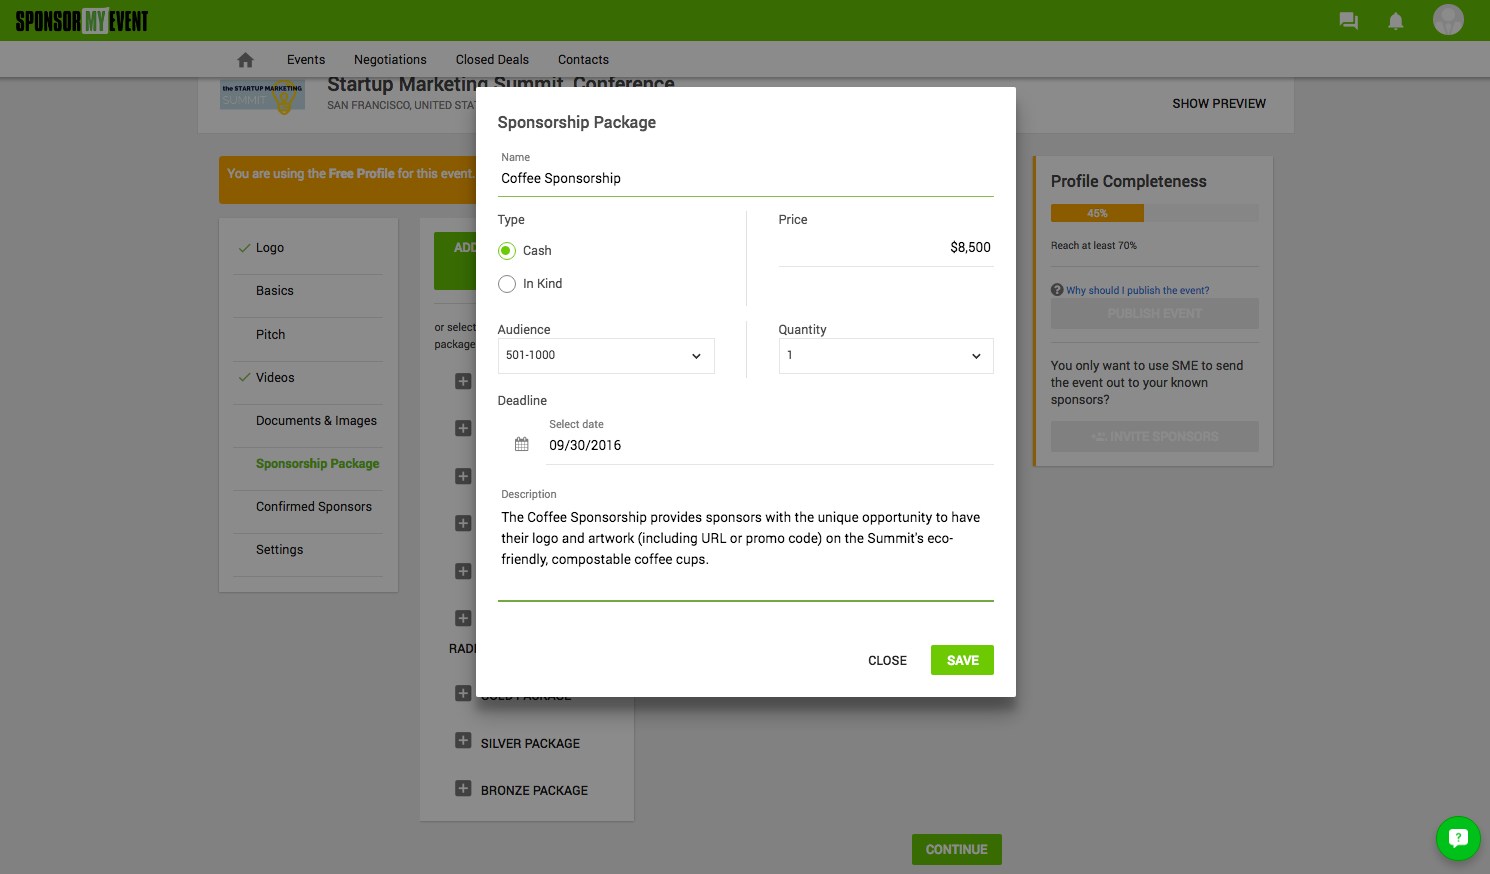
Again, the description is key because it’s your chance to communicate the value of the sponsorship package. Try to be as clear as possible about what the sponsor will receive in terms of tangible benefits and ROI.
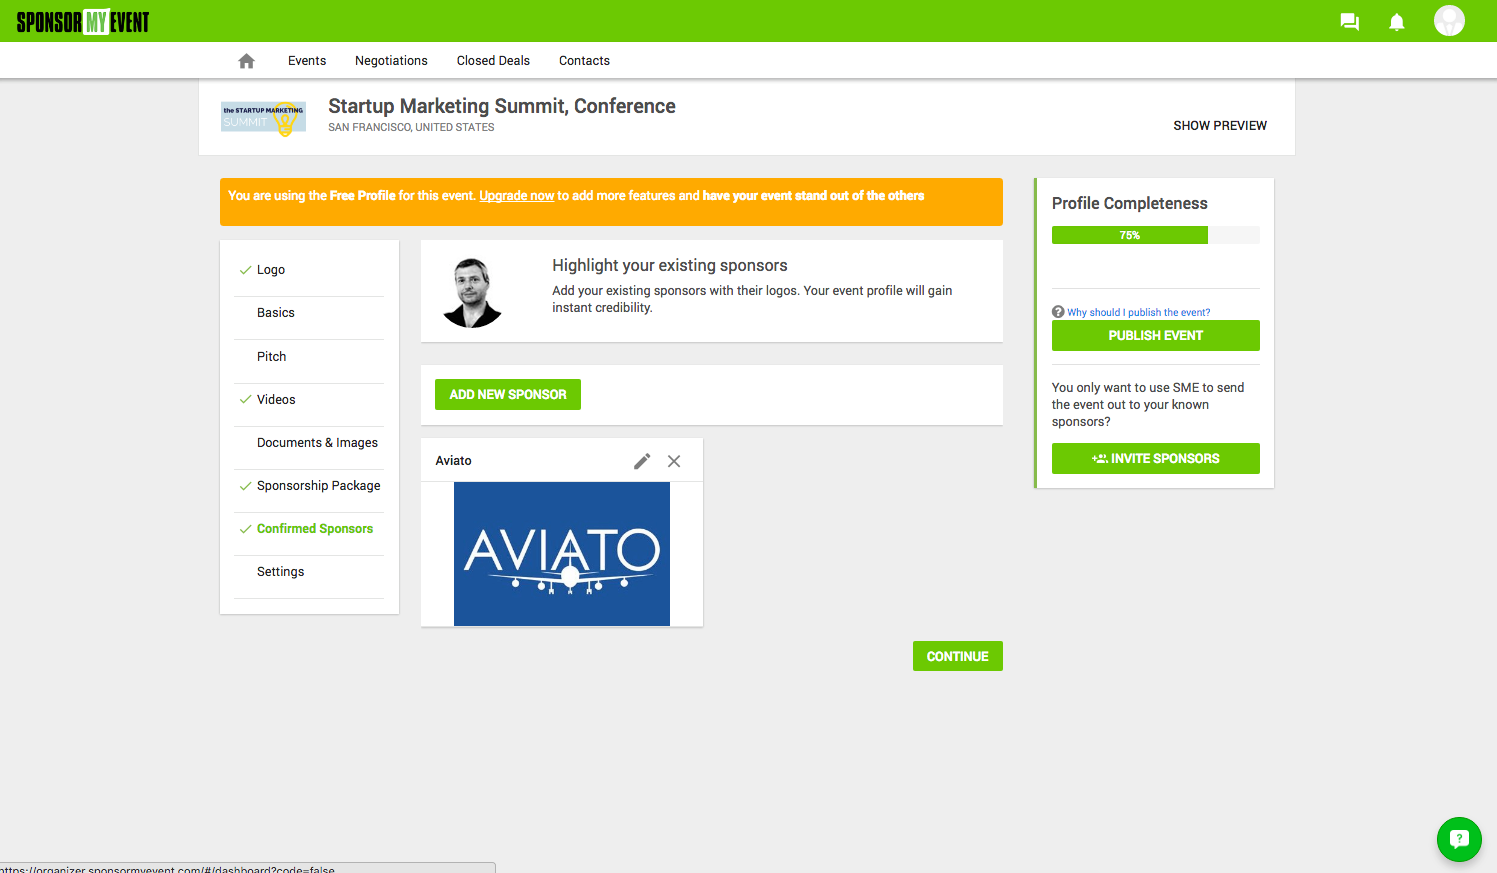
Confirmed Sponsors
Here, you’ll be able to upload logos and list any already-confirmed sponsors for your event. This is helpful for prospective sponsors to be able to see who their peers will be as sponsors for your event. It’s an important social-proof point that should not be overlooked if you do already have confirmed sponsors.
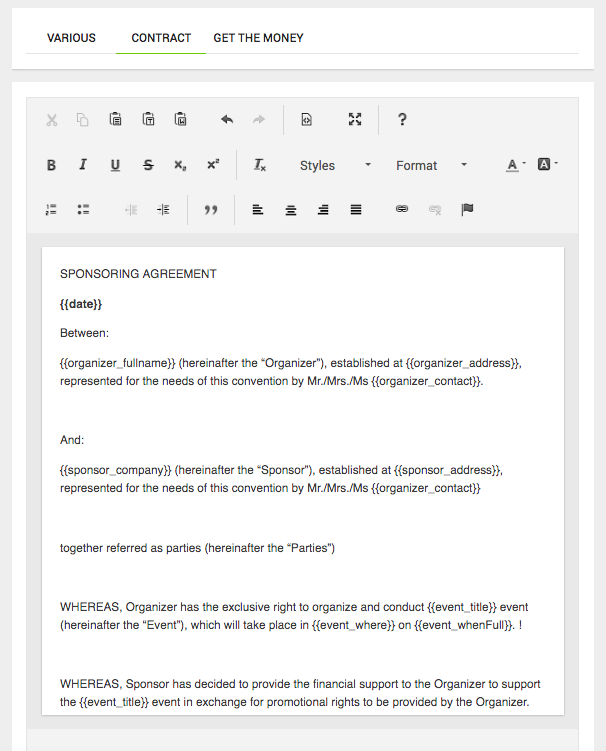
Settings
Lastly, you’ll use this tab to manage your event’s settings. You can use the included contract language or paste in your own.
The Settings tab is also where you’ll connect your Stripe account in order to receive payment for sold sponsorships.
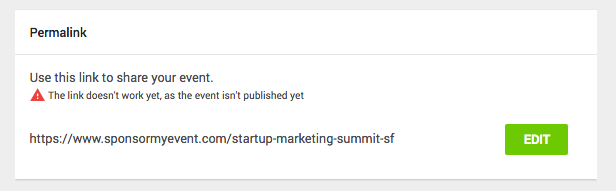
PROTIP
Be sure to check the auto-generated URL for your event page. Try to keep the URL as short and concise as possible.
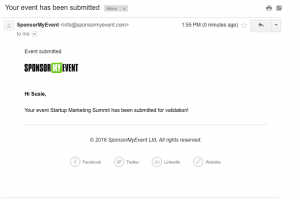
When you’re finished with filling out your event’s profile and you’ve exceeded 70% completion, you’ll need to submit it for review by the SponsorMyEvent team.
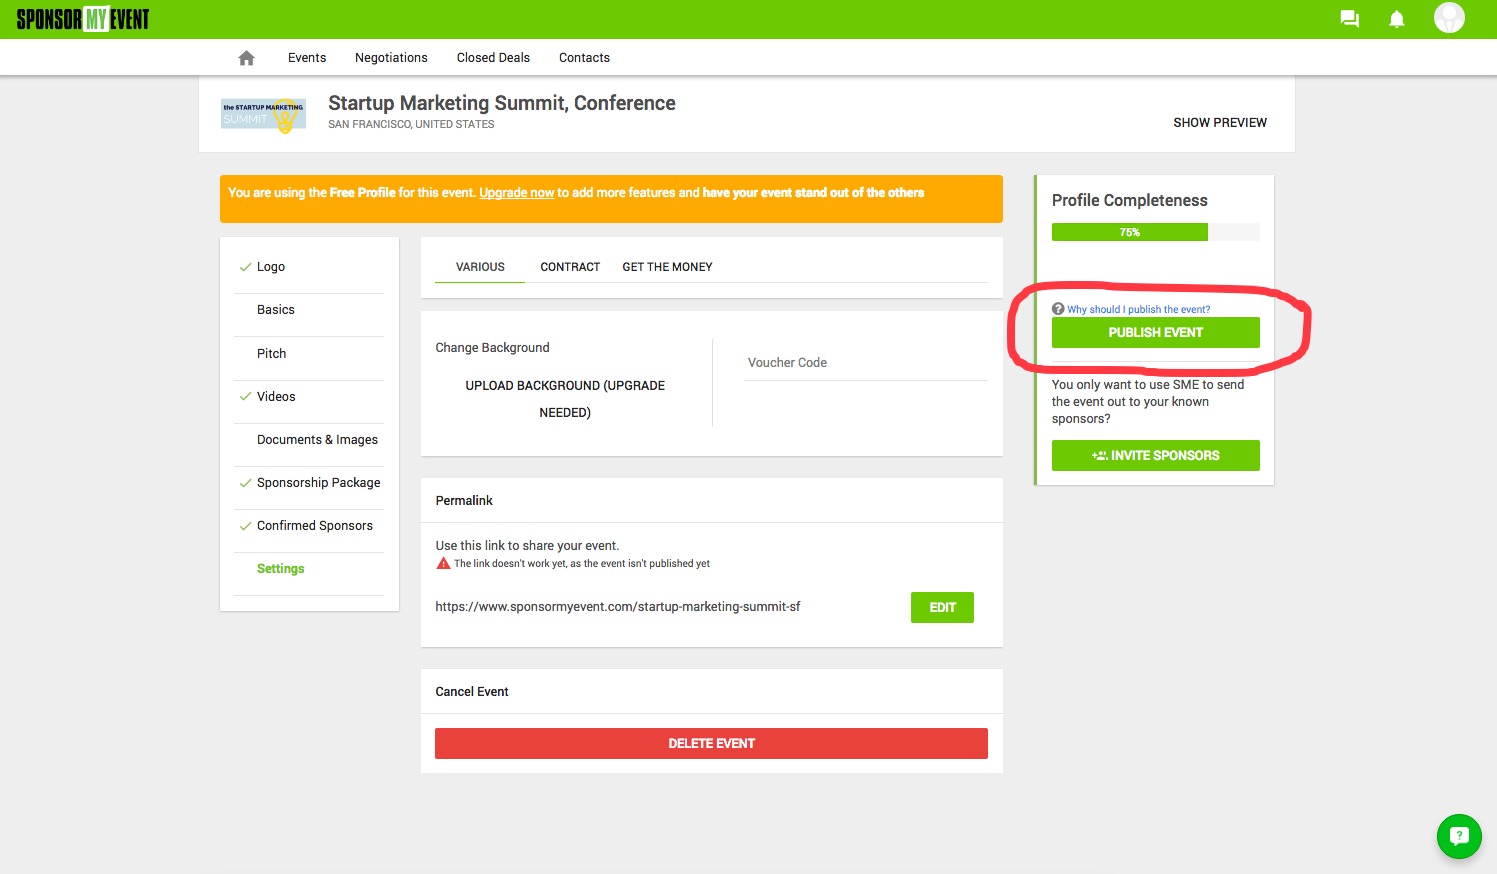
Upon approval, your event will be visible to prospective sponsors in the Marketplace. By following the best practices outlined here, you’ll provide the best possible chance for acceptance to the Marketplace and you’ll also make your event as attractive as possible upon publication. When you’ve clicked the “Publish Event” button on the right hand sidebar, you’ll be guided through a few final steps and after completing those, you’ll receive a confirmation email letting you know that the SME Team has received your event application and it’s in the review queue. You will also see that your event is awaiting validation on your dashboard.